
If you have ever scrolled through Pinterest and wondered how people create those gorgeous, layered Victorian journal spreads that look like they took hours, I have good news: they did not. Here is exactly how I made these pages, step by step, using Canva, the Paper app, and elements from my Victorian Traveller Junk Journal Kit, including two free backgrounds you can download right now and start using today.
Prefer watching over reading? I just posted a quick Reel on Instagram walking through this exact process start to finish – check it out here if video tutorials are more your thing.
What You Will Need
- A free or paid Canva account
- The two free vintage backgrounds included at the end of this post
- The Victorian Traveller Junk Journal Kit (180+ PNG elements with transparent backgrounds, commercial use included)
- Paper app on your phone or iPad (free version works perfectly for storing and displaying your journals)
- About 30 to 60 minutes and a cup of something warm
Step 1: Set Up Your Document in Canva
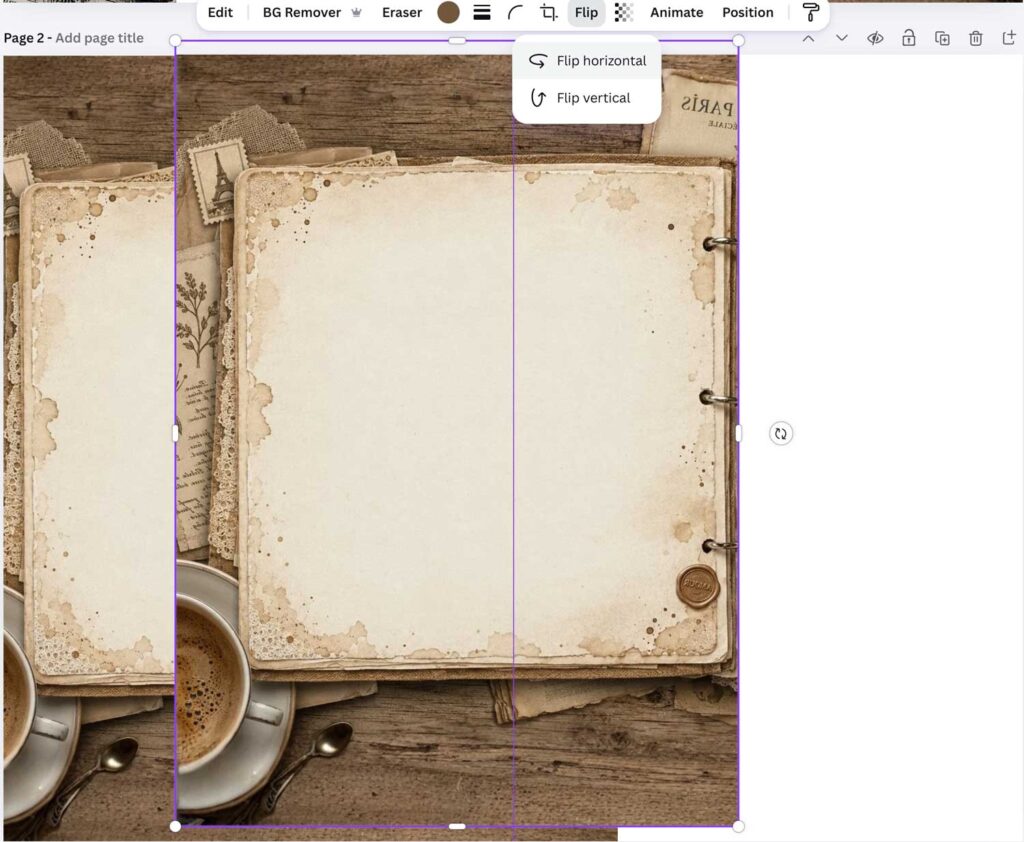
Open Canva and create a new custom design. Set the dimensions to 11 x 8.5 inches – this is a standard landscape journal spread size and works beautifully for a two-page layout.
Once your canvas is open, add a guide down the center of the page. In Canva, drag a vertical guide from the left ruler toward the center – it will snap into place automatically at the halfway point. This guide is your invisible spine, dividing the spread into a left page and a right page. Everything you design will respect this invisible line.
Step 2: Add Your Background
Download the two free vintage backgrounds at the bottom of this post. These are bonus backgrounds from the Victorian Traveller Kit, and they are a perfect starting point.
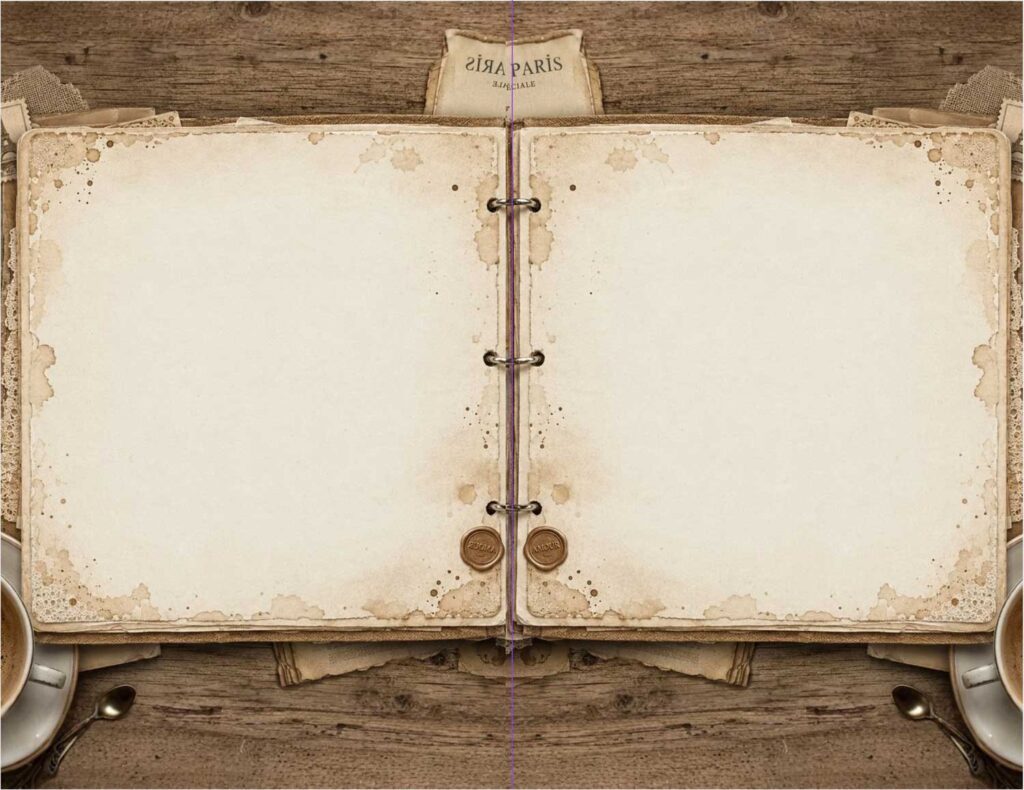
Import one background into Canva and place it on the left half of your spread, resizing it to fill exactly that side. Then duplicate it, flip it horizontally (use Arrange > Flip Horizontal in Canva), and place the mirrored version on the right half. This creates a perfectly symmetrical double-page spread with that satisfying open-book feeling, without any visible seam.
Step 3: Layer the Bonus Vintage Backgrounds Over the Pages
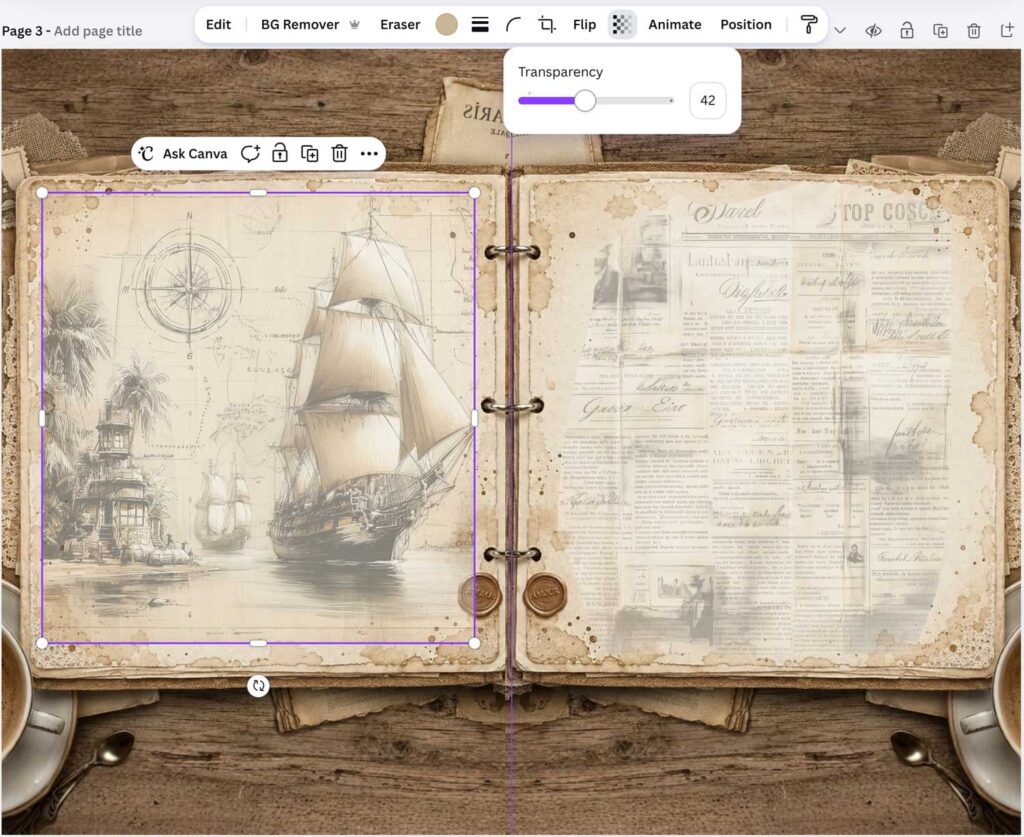
Inside the Victorian Traveller Kit you will find a folder of Bonus Vintage Backgrounds, including aged paper textures, Victorian newspaper pages, antique maps and atmospheric scene illustrations.
Pick one or two that complement your base background and import them into Canva. Place them over the journal pages and crop or resize them so they sit neatly within the page area without spilling over the edges.
Here is the key step that makes everything look cohesive: lower the transparency of these overlay backgrounds to around 40%. This lets them blend softly into the surface beneath, adding depth and texture without overwhelming the base. The result looks like aged, layered paper rather than a flat digital collage.
Step 4: Start Building Your Clipart Layers
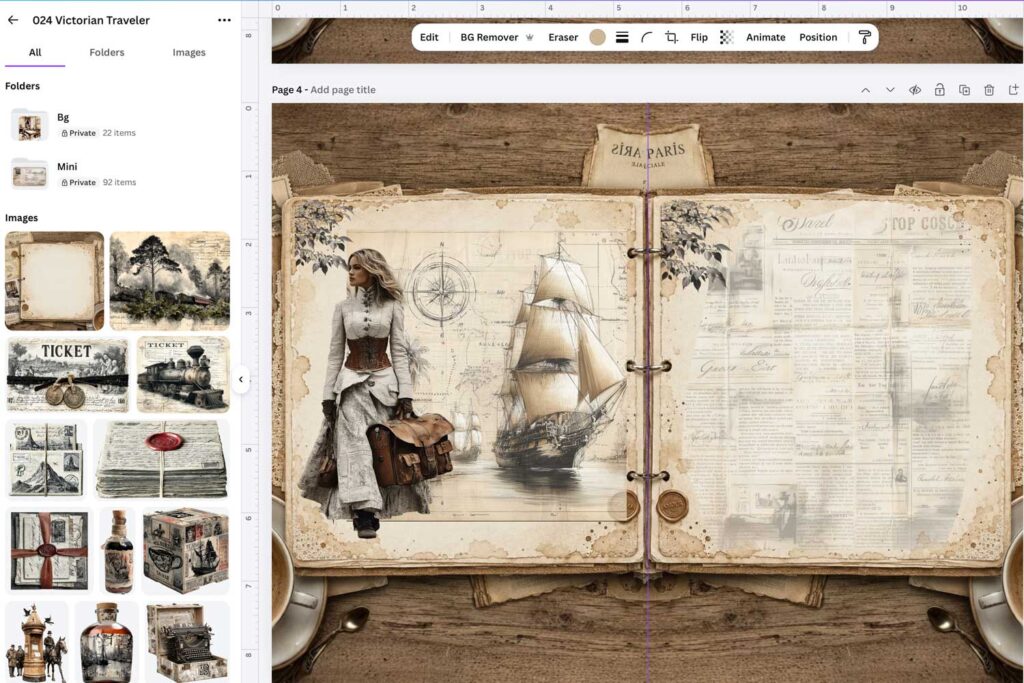
Now comes the fun part. All the PNG elements in the Victorian Traveller Kit have transparent backgrounds, which means you can drag and drop them directly onto your canvas in Canva, Procreate, the Paper app, or any other graphics editor without any background removal, masking, or fussing around.
The golden rule of layered collage work: start from the bottom and work your way up.
Begin with your largest background elements – atmospheric scenes, large botanical clusters, sailing ships or architectural illustrations. Place these first and treat them as your foundation layer. Then add mid-size elements on top: Victorian women, luggage, antique maps, compasses. Finally, finish with the smaller detail pieces that sit on top of everything: tea cups, letters, flowers, individual objects.
Canva lets you reorder layers at any point by right-clicking an element and choosing Forward, Backward, or using the Layers panel, so nothing is permanent. But starting from the bottom genuinely saves time and makes the composition feel more intentional from the start.
Step 5: Add Decorative Elements That Overlap the Journal Edges
One of the details that makes a digital journal spread feel alive rather than flat is having elements that extend slightly beyond the journal page edges onto the wooden table or background surface beneath.
Add a tropical plant spilling out from the bottom, a butterfly drifting off the corner, or a loose piece of ephemera curling off the edge of the page. These small touches break the rigid rectangular frame of the journal and make it feel like a physical, three-dimensional object.
Step 6: Add the Bonus Text Labels
The Victorian Traveller Kit includes a set of Bonus Text Labels and Cluster Elements: embossed banner strips with phrases like “By Rail By Sea,” “Wild & Free,” “Adventure Is Calling” and “Collect Moments.”
Place these labels over your composition as finishing touches. They add a typographic layer that ties the whole spread together and gives it that editorial, polished look you see in high-end junk journal content on Pinterest. Position them at angles, overlap them slightly with your clipart elements, and let them feel organic rather than perfectly straight.
Here is a small trick that makes a noticeable difference: add a drop shadow to your labels. In Canva, select the label, go to Edit > Shadows > Drop Shadow and adjust the blur and offset to taste. A subtle shadow lifts the label off the page and gives it that satisfying sense of depth, like a physical sticker pressed onto paper rather than a flat graphic sitting on a screen.
I do the same with many of the smaller clipart elements throughout the spread. A gentle drop shadow on a tea cup, a letter, or a compass makes individual objects feel grounded and three-dimensional rather than floating. It is one of those finishing touches that is easy to overlook but impossible not to notice once you start doing it. The whole composition instantly feels more tactile and real.
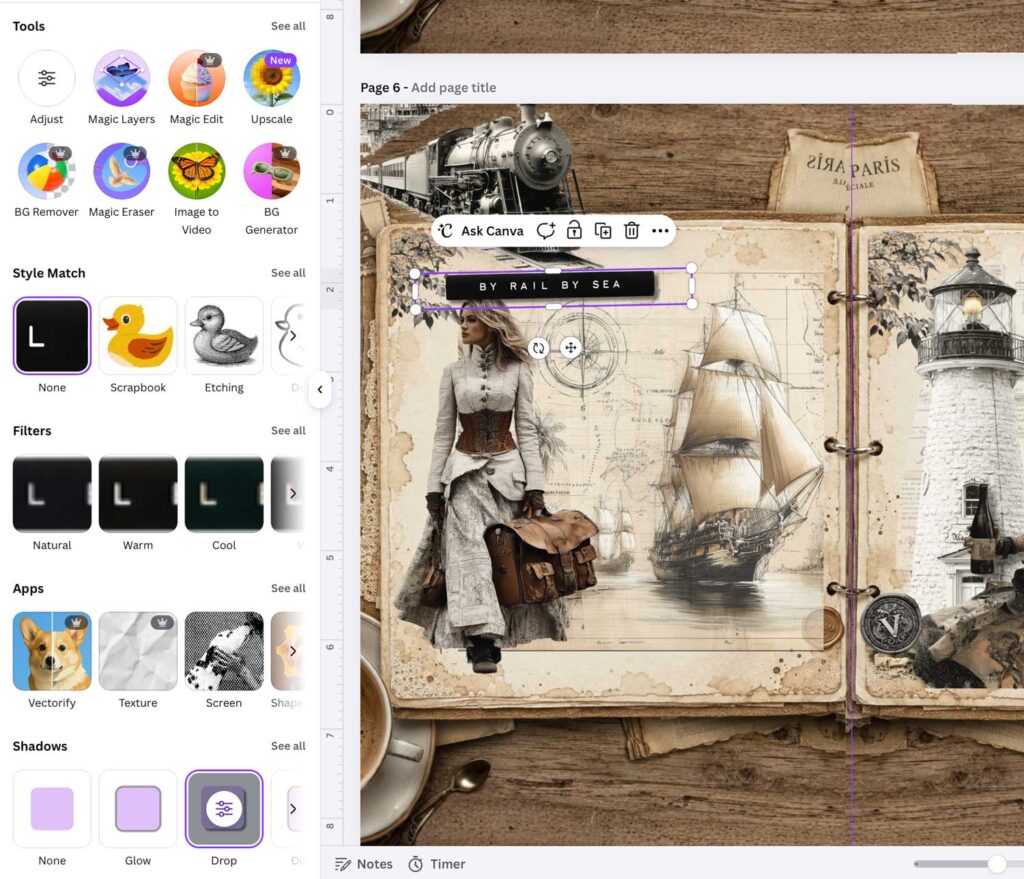
Step 7: Add a Binder Ring in the Center
If your base background does not already include a journal binder in the center spine area, add one now. In Canva, simply search for “binder rings” in the Elements panel. There are plenty of options available even in the free version of Canva. Place your chosen rings right along the center guide, overlapping both the left and right pages equally.
This single detail transforms a flat two-panel design into something that looks convincingly like a real open journal. It is a small addition that makes a significant visual difference, especially when you share your pages on Pinterest or Instagram.
Step 8: Export and Import Into the Paper App
When your spread is finished, export it from Canva as a PNG file at the highest resolution available.
Open the Paper app on your iPhone or iPad. Paper is free to download and the free version is perfectly sufficient if you are using it to store, display and flip through your finished journal pages. Tap the three dots on any journal, choose Import Images, and your Victorian spread will appear as a beautiful full-page layout inside your digital journal.
If you prefer to build your journal pages entirely within Paper app without using Canva, the paid version gives you that flexibility. But personally, I prefer Canva for the design stage because of the layer control and the sheer variety of tools available, and Paper for the final presentation. They work together seamlessly.
Want to Skip the Design Process Entirely?
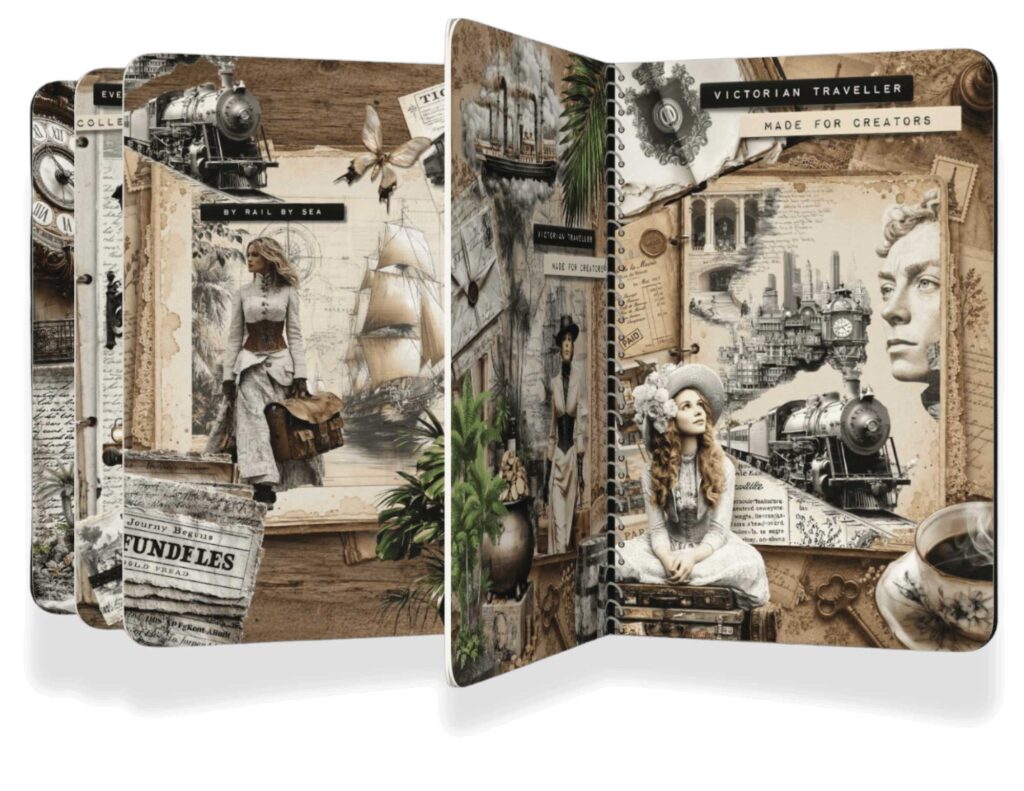
If you love the look of these Victorian journal pages but want to go straight to journaling rather than designing, I have put together a set of 6 ready-made Victorian Traveller Junk Journal Pages in high resolution, designed and layered and ready to import directly into your digital journal or print at home.
Each page is a complete, cohesive spread built from the same Victorian Traveller Kit elements you see here, just done for you. Download, import into Paper app or GoodNotes, print and trim, or use as-is in your favorite digital journaling setup.
Download the Ready-Made Victorian Junk Journal Pages here
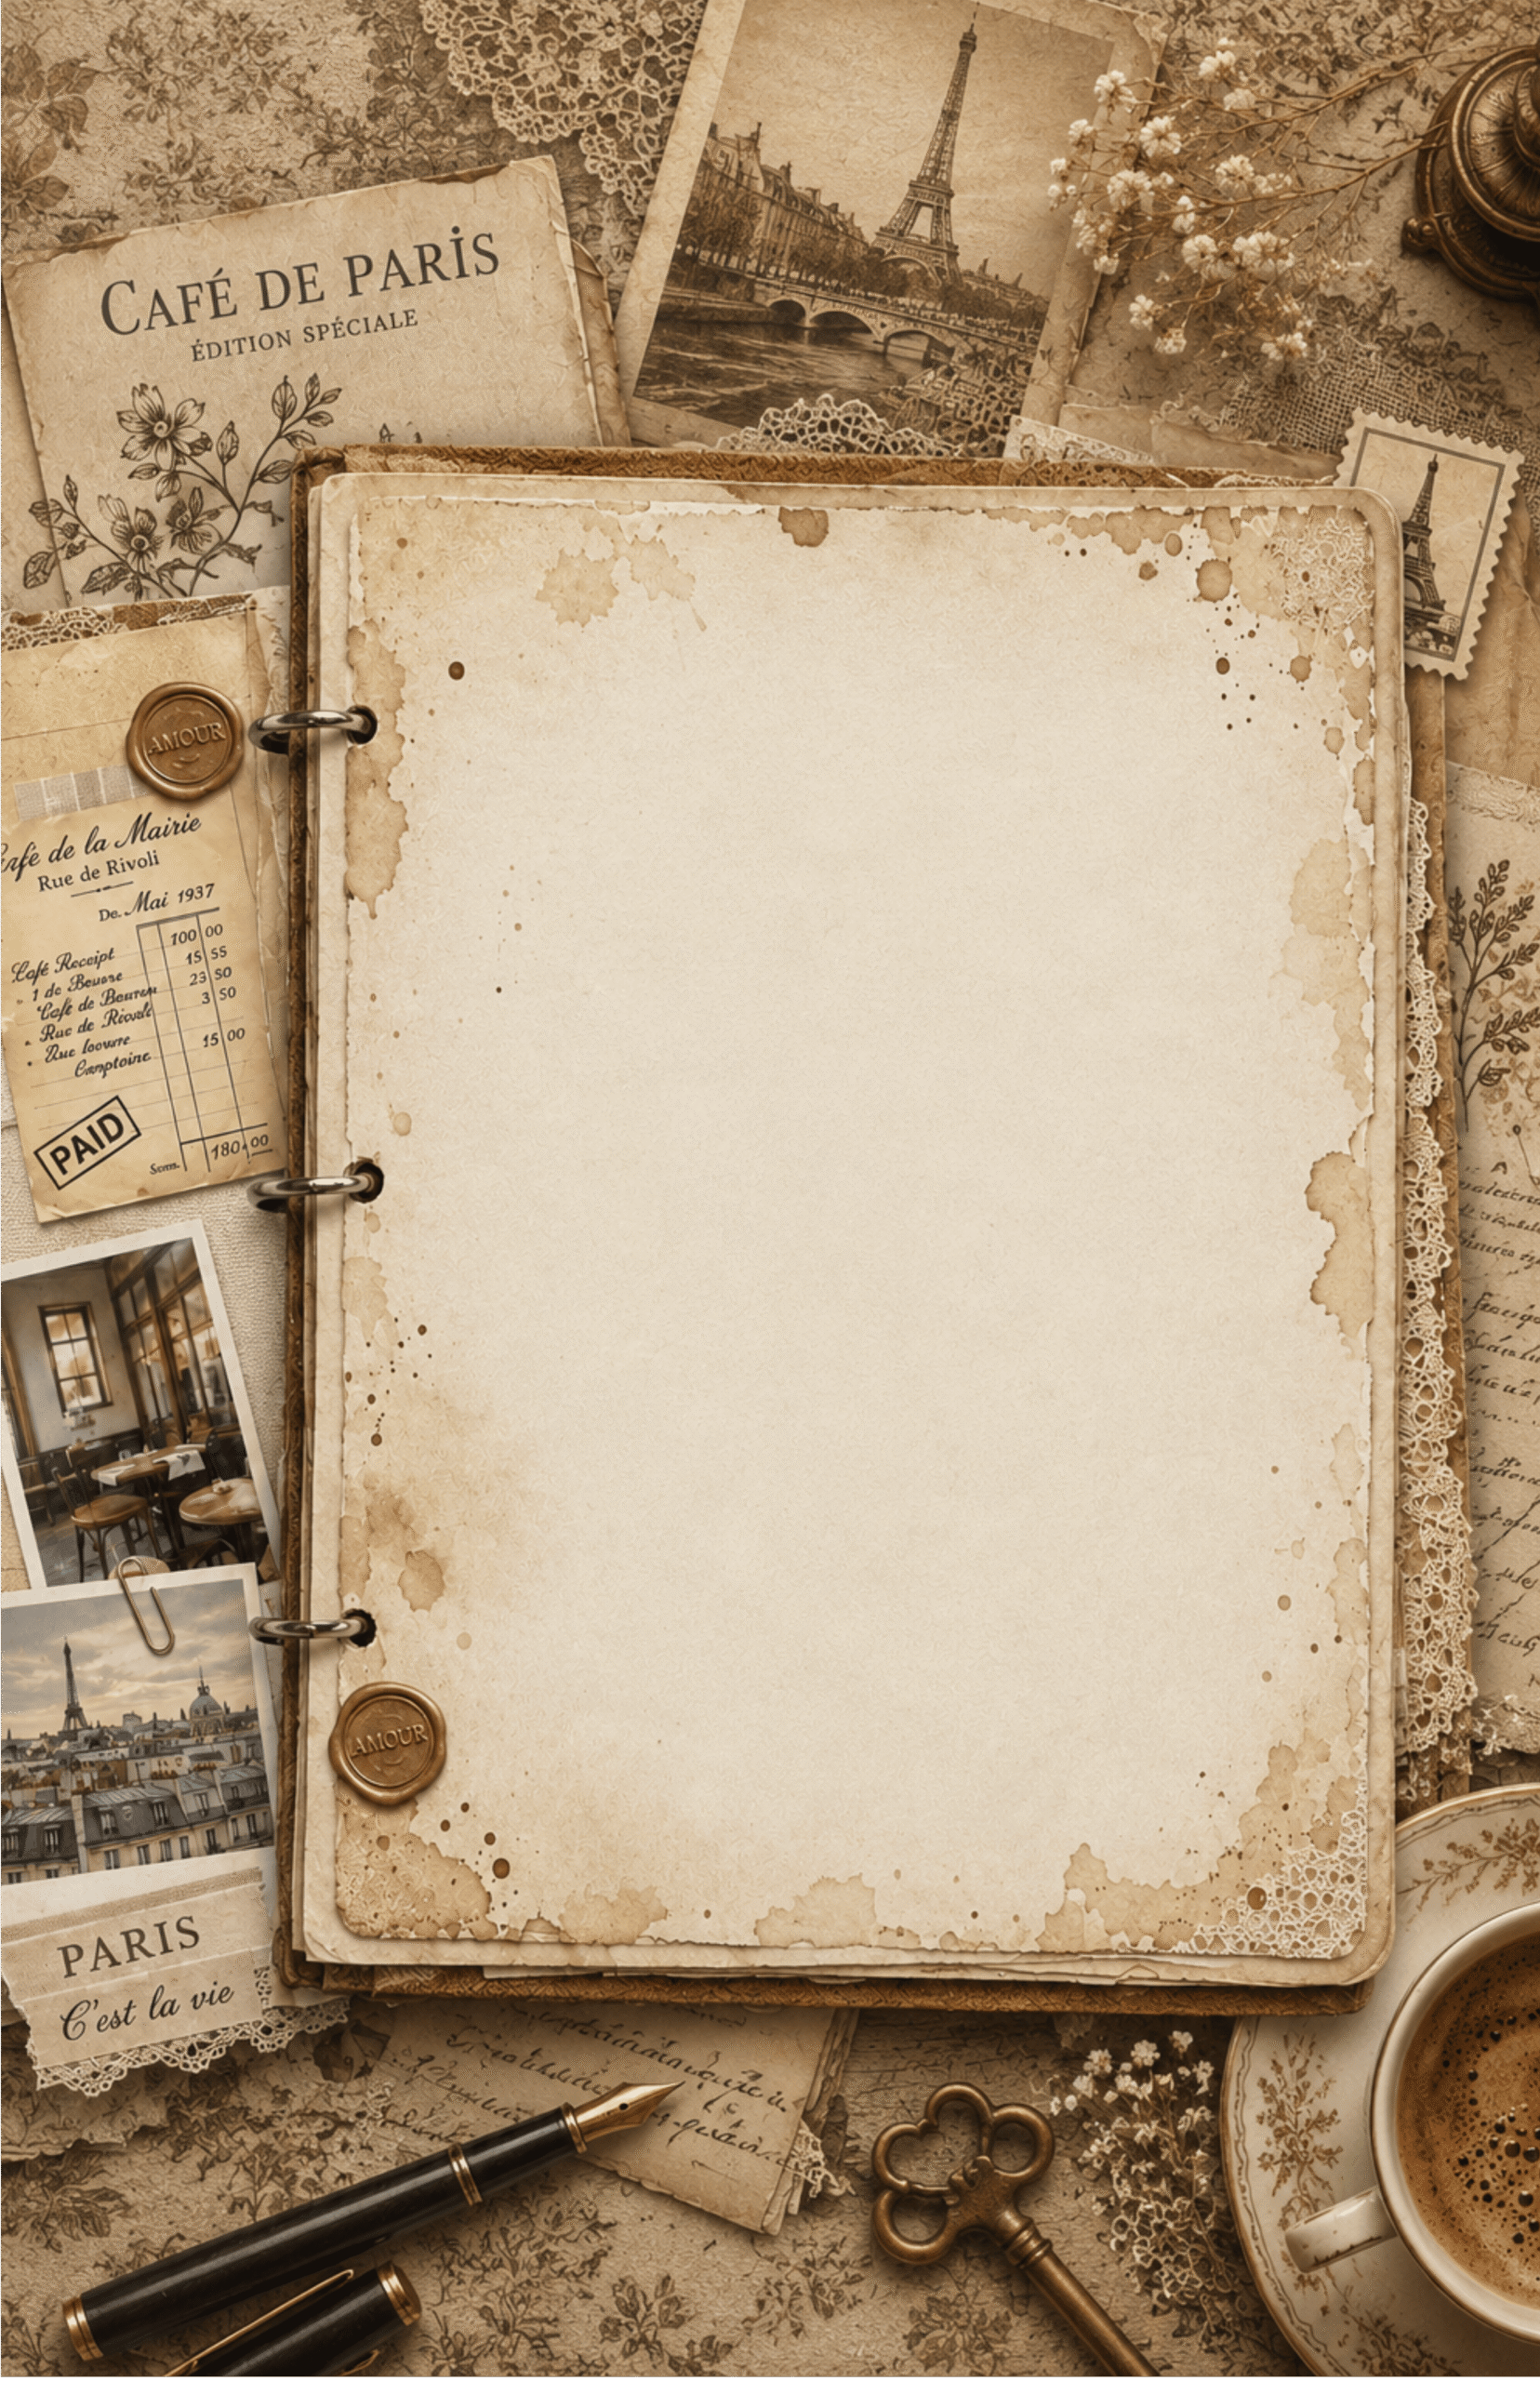
Free Vintage Backgrounds – Download Now
To get you started right away, here are two free vintage backgrounds from the Victorian Traveller collection. Use them as your base layer in Canva following the steps above, and see how quickly a beautiful spread comes together.
Download Free Victorian Background 1 (the one I used above)
Download Free Victorian Background 2
Loved this tutorial? Save it to your Pinterest boards so you can find it again, and tag me when you create your own Victorian journal spread. I would genuinely love to see what you make with these elements.